Description
The StealthGrip2N1 brings innovation to the traditional stamped-out leather badge holder with laser-cut precision and high-tech materials. The StealthGrip 2N1 is a truly custom badge holder that is designed and crafted based off a customer-supplied photograph of the back of his or her badge. This custom-fit philosophy solves the problems experienced with leather "universal fit" badge holders that don't fit well, rattle, and flop around on the the belt. Built from our proprietary ACX-57 material, the StealthGrip 2N1 badge holder is extremely light, durable, and waterproof.
The StealthGrip2N1 is named for its ability to be securely and comfortably worn on the belt via its standard belt clip or on a lanyard around the neck. Switching from the belt clip to a lanyard is a simple process that only requires the use of a Phillips head screwdriver. The StealthGrip2N1 badge holder ships with instructions on how to swap these components. The instructions can also be found at the bottom of this page.
How to Order
Please follow these instructions so that we can make your custom badge holder perfectly:
- Submit a photo showing the back of the badge. We need to see the back so that we know where the pin/clip is located on your badge.
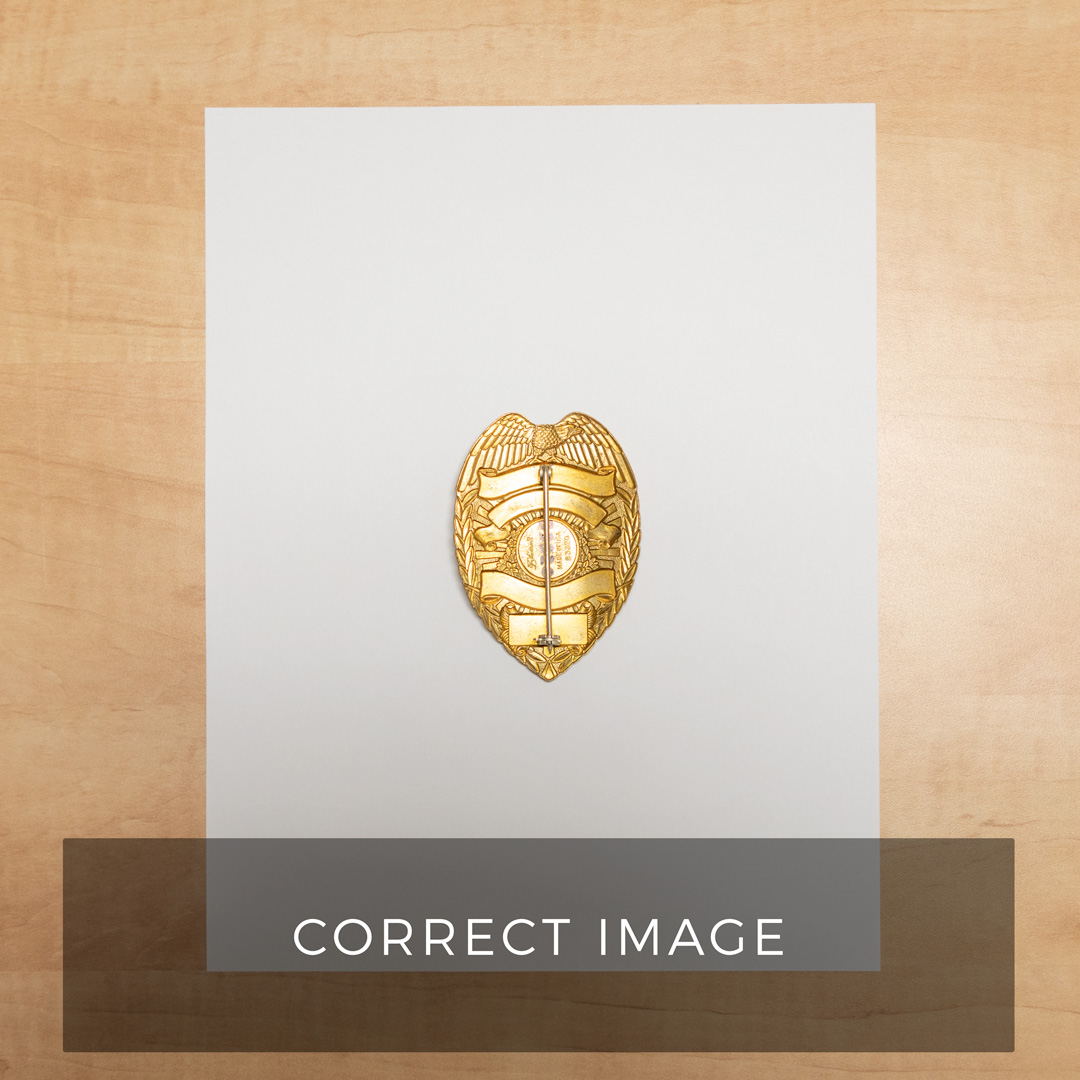
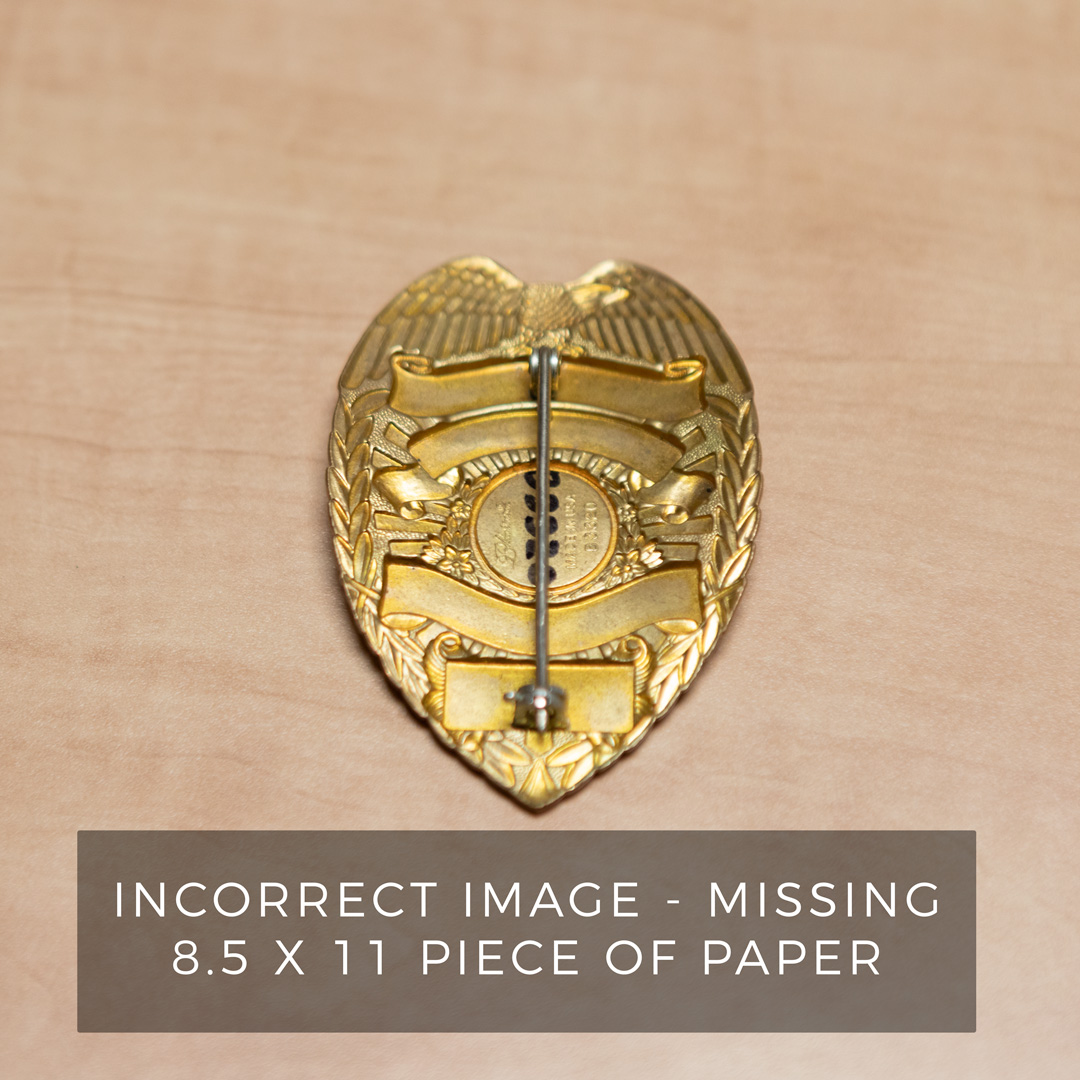
- Take a photo of your badge (face down) on a standard sheet of 8.5"x11”. It's important that it's on a standard sheet so that we can measure your badge accurately.
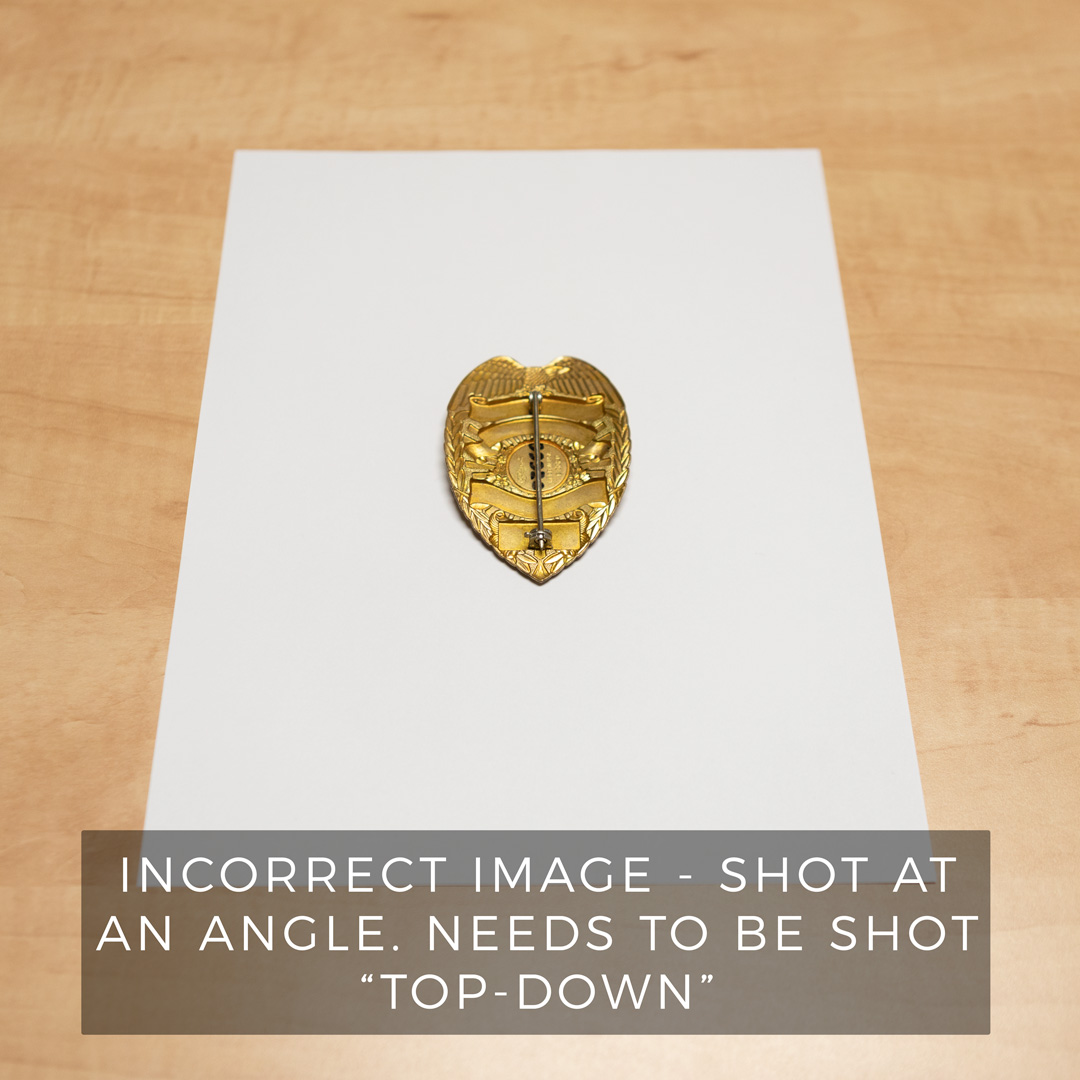
- Place the badge face down on the sheet and take the photo directly above the badge so that all four corners of the paper are visible and the sides of the sheet are parallel to the edges of the camera frame. (Minor shadows on the page are okay.)
Following these steps should provide us with a good reference photo from which we can make your custom StealthGrip 2N1 badge holder. If there is an issue with your photo, a sales rep will contact you via the email address you entered when ordering. Please reference the images below to see how your photo should look and some common mistakes we're seeing with submitted photos:

This is how your photo submission should look. Top down image with the edges of the paper parallel with the edges of the photograph.

The most common mistake is taking the photo at an angle.

Our design team uses a standard 8.5 x 11 sheet of paper as reference in order to take measurements of your badge. Without that point of reference it is impossible to determine the measurements of your badge.
How to Install Your Badge
- Thread the pin of your badge through the top hole and press it flat across the back of the badge holder.
- Attach the pin to its retainer clasp.
How to Install the Lanyard
- Install your badge.
- Remove the belt clip by removing the two screws holding it in place.
- Separate the two pieces of the badge holder and place your lanyard in the recessed slot.
- Place the two pieces of the badge holder back in their original positions.
- Re-install the screws. You can re-install the belt clip, or you can use the provided washers in place of the belt clip.
- We recommend adjusting the lanyard as needed before tightening the screws down all the way.
Once you have decided on your preferred method of carry (belt clip or lanyard), we recommend treating the screw threads with a drop of blue threadlocker.
Additional Details
- SKU:
- SG-2N1-Custom


